
Cosplay Photography
Cosplay Photography 101: Starting Strong
May
They say a picture is worth a thousand words, but in cosplay, a picture is worth an entire anime season! Whether you’re channeling your inner Goku or slaying it as Sailor Moon, capturing that perfect cosplay shot can sometimes feel more challenging than it does to collect every Dragon Ball. Ready to flex your photography skills and immortalize your epic costumes? Let’s dive into Cosplay Photography 101: Starting Strong!
Unleash Your Inner Photographer
Know Your Character
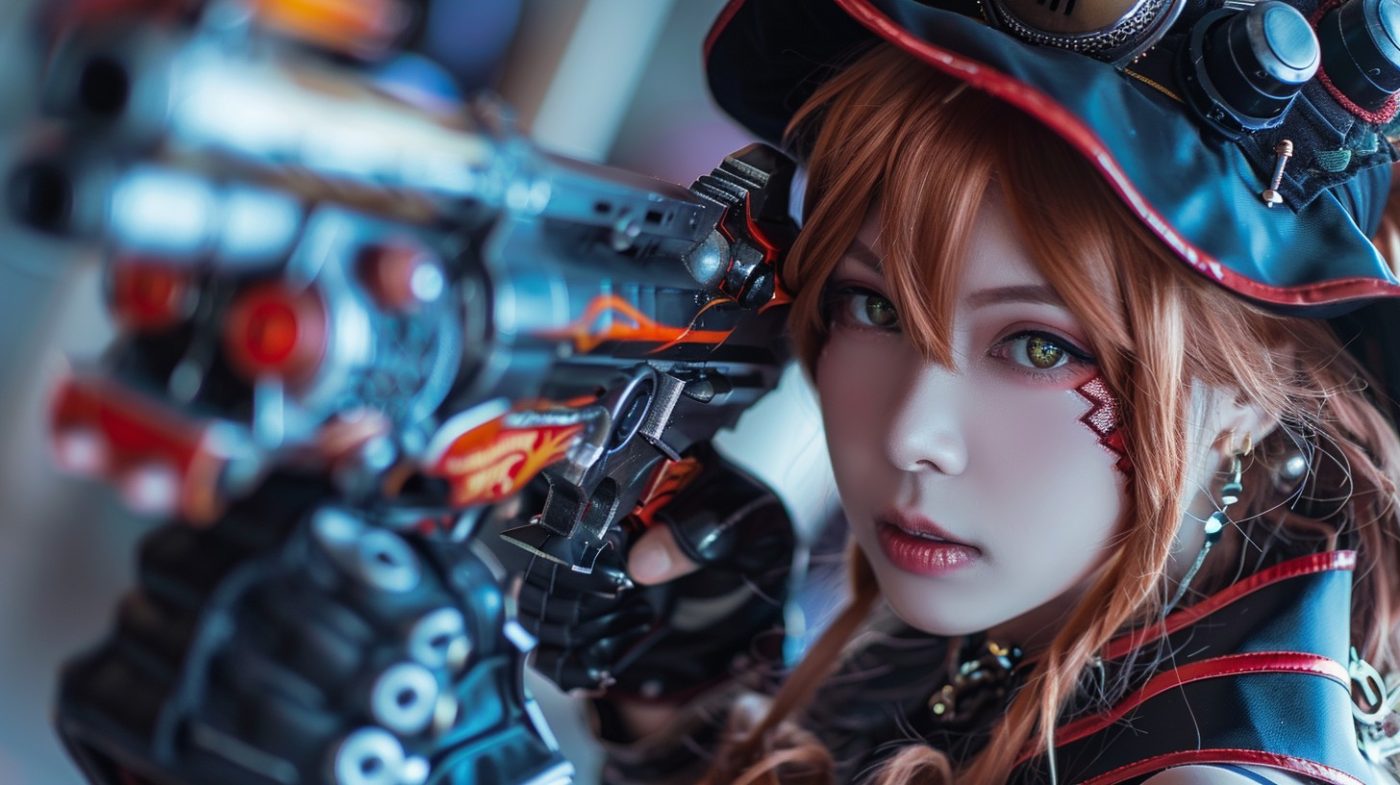
Before you snap a single shot, immerse yourself in the character you’re cosplaying. Know their signature poses, expressions, and iconic scenes. Remember, you’re not just wearing a costume; you’re bringing a character to life. And trust me, Pikachu never looked bored!
The Perfect Gear
Okay, so you might not need to wield a legendary weapon (or maybe you do), but having the right gear can make a world of difference. Here’s your beginner’s toolkit:
- Camera: Your smartphone is a solid start, but a DSLR can level up your game.
- Lens: For those with DSLRs, a nifty fifty (50mm) lens captures gorgeous portraits.
- Tripod: Steady shots beat shaky hands every time.
- Lighting: Natural light is your friend. If indoors, soft-boxes or ring lights are lifesavers.
Settings 101: Cameras Unveiled
Ever felt like your camera settings were written in ancient runes? Let’s decode them:
- Aperture (f-stop): Lower numbers (f/1.8) give a dreamy background blur (bokeh), perfect for making your cosplay pop.
- Shutter Speed: Fast settings (1/500) freeze motion, while slower settings can create dramatic effects.
- ISO: Lower settings (100-400) reduce the grain, for those crystal clear shots.
Chase the Light
Natural vs. Artificial Light
Lighting can make or break your cosplay photo. Natural light is like the ramen of lighting – always delicious. Try shooting during the golden hours (early morning or late afternoon) for that magical glow.
Can’t shoot outside? No worries! Ring lights or softboxes mimic that natural goodness. Pro tip: Avoid harsh overhead lighting; it’s like a bad filler episode – nobody likes it.
Use Light to Your Advantage
- Front Lighting: Brightens up your face and costume.
- Backlighting: Creates a dramatic silhouette.
- Side Lighting: Adds depth and drama (perfect for those villain looks).
Frame It Like a Pro
Rule of Thirds
Imagine your frame divided into a tic-tac-toe board. Place your subject along these lines or at their intersections. It’s a cheat code for dynamic shots.
Angles and Perspectives
Don’t just stand there! Move around, get low, or climb up high. Different angles can transform a mundane photo into something straight out of a shonen battle scene.
- High Angle: Creates a sense of vulnerability or emphasizes a cute character.
- Low Angle: Makes your character look powerful and larger-than-life.
- Dutch Angle: Tilt your camera to add tension and drama. Think JoJo’s bizarre adventures.
Background Matters
Your background can either enhance or distract. Choose locations that complement your character. Are you cosplaying a dreamy Studio Ghibli character? A serene park with blooming flowers is your playground.
Post-Production Magic
Basic Editing Software
Editing is where the real magic happens. Here are some tools to get you started:
- Adobe Lightroom: For color correction and light adjustments.
- Adobe Photoshop/GIMP: For more detailed edits and effects.
- VSCO/Snapseed: Mobile-friendly options for those quick touch-ups.
Touch-Up Tips
Remember, less is more. You don’t want to over-edit and turn your photo into a pixelated nightmare. Focus on:
- Color Balance: Make those colors pop without blinding the viewer.
- Sharpness and Clarity: Clean, crisp details make your cosplay shine.
- Background Blur: Enhance the focus on your character if needed.
Strike a Pose!
Iconic Poses
Recreate iconic scenes or poses. Not only do they make for recognizable and dynamic shots, but they also channel your character’s spirit. Think of:
- Naruto’s “Rasengan.”
- Sailor Moon’s transformation poses.
- Cloud Strife’s Buster Sword stance.
Natural Poses
Don’t forget to mix in some candid, fun shots. Show off the personality behind the character. After all, it’s those genuine, anime-loving moments that truly shine.
The Power of Practice
Learn and Improve
Rome wasn’t built in a day, and neither will your cosplay photography skills. Keep experimenting and learning. Follow fellow cosplayers and photographers on social media for inspiration and tutorials. Join cosplay groups and forums to share your work and get valuable feedback.
Let’s Wrap It Up
Cosplay photography is more than just snapping pictures; it’s about storytelling, creativity, and passion. Whether you’re a newbie wielding a smartphone or a seasoned pro with a DSLR worth more than your rent, every shot tells a unique story. So grab your gear, strike a pose, and capture the magic one frame at a time.
And remember, the cosplay journey is as thrilling as an anime arc. Keep your camera charged, your spirit high, and may your photos be as epic as your favorite battles! Until next time, happy snapping!